Tuesday, June 26, 2012

Bungee Jumping with Bungee America!

I had an opportunity to go on a bungee jumping day trip to Azuza Canyon with a group of OC bloggers through Bungee America. And I could take another person with us as well. It would include a 5 mile hike, lunch, and one of us could bungee jump off of a bridge and then a 5 mile hike back to the car. My teenage self said "heck yeah", but my older (ehem) self, 5 years post back surgery, said, "thanks but I'll hike and I'll let my 17 year old son jump". He said "Heck yeah!" without hesitation when I asked him. So off we went. 
Kelly Weppler, Tanya Salcido, Debbie Miller, Becca Tran, me
We met in Azuza Canyon at the parking lot at 7:30 am on Saturday. We had to fill out paperwork and get checked in. There were about 3 jump instructors from Bungee America that hiked in with our large group of about 50 or more, and other instructors that met us at the jump site. 
Hiking into the canyon took about 2 1/2 hours at a brisk pace with a couple rest stops. There were lots of hikers and even gold panners around the trail and in the river. We hiked through the river several times, up hills, down hills, and over all kinds of terrain. I'm so glad I was in somewhat good shape. I'm sure I wouldn't have made it if I hadn't been. 
I had to keep up with my son after all. (don't you like my butt pack?) photo courtesy of Tanya S.


When we got to the bridge, we enjoyed lunch under shade and also enjoyed bungee instruction which was both informative and pretty hilarious. The instructors were captivating and pretty funny as well. I wasn't nervous one bit about letting my son's life be at their hands. As long as they did their part, and he followed instructions, all would be fine. 
I knew this because I did a little research on Bungee America. They've been doing these jumps at this site for over 23 years. They own the bridge and the property surrounding it. They make their own bungee cords which have multiple back ups and their safety record is 100% perfect!
So yeah, I trusted Bungee America with my son's life and I smiled and filmed as he jumped off that Bridge to Nowhere without being hardly nervous at all. 
video by Tanya S.
I was excited for him to have an experience of a lifetime. And he did. 

Wednesday, June 20, 2012

Style-Assistant: Your Virtual Shopping Site


When shopping online wouldn't it be great to be able to see how clothing items look together and on a body? What if you could style those clothes in different ways to see how they work? Also wouldn't it be cool to ask friends and family if they like the look you came up with before you buy? Style-Assistant allows you to be able to do those things and more. Heather Keiser, the developer of this site, is brilliant. She is a graphic designer/illustrator who taught herself coding for web design. She combined both of those skills and more and the result is Style-Assistant. Heather was the other guest at Steph Calvert's blog party this week and I was really excited by what she showed us. I want to share it with you! The site is still in beta and there are somewhat limited choices to shop from, but it will be growing quickly.


You start by searching on the bottom of the page for items. They are categorized to make it easy to shop. Once you choose your item, the right column allows you to change the color of that item if that's an option and even style things like tuck in tops, put scarves on many different ways. If you don't like the item, you can remove it. It's so much fun. As you shop too, you'll see the items listed on the top left with price and a total price for all of them together for you to keep track of how much you're spending.


So after putting together outfits, you then save them to your "Wardrobe". You can then allow family and friends to comment on them if they go to the site or you can post them onto Twitter or even Facebook. Go sign up, it's free and start shopping the easy way. You don't have to sign up to search and put together items, but you have to be registered to save them on the site and purchase them. If you have questions, ask away. I'll contact Heather if I don't know them.

Tuesday, June 19, 2012

The Wardrobe Code Helps You Reclaim Your Personal Style


I learned last night, that if you dress with confidence, it can bring you power. This is an important mantra that Nicole Longstreath of The Wardrobe Code, lives and works by.


My friend Steph Calvert held a blog party at her home and invited Nicole and another person to speak, which I will share more about in tomorrow's post.


It was a night of fun food, chat, and homemade soda, along with the best damn deviled eggs from chickens she owns. The pun never ends.

Back to the subject I was talking about. Nicole likes to call herself a wardrobe strategist. She works with people like you and I, and not necessarily the people that shop high end designer fashions at department stores. Nicole believes that you can built a complete wardrobe with items in your closet and items from thrift stores. She helps you can reclaim your personal style and make it affordable. The reason she primarily shops from thrift stores, is that you can repurpose never worn, to barely worn items. Thus making it not only good for the environment, but also being able to shop many styles and not just one collection from one season at a regular clothes store. Nicole helps you shop quality items, so you end up with a curated collection of items you can easily choose from everyday. She offers 3 different and affordable services to help you reclaim your style. I encourage you to contact her and check out her website.


Friday, June 08, 2012

Beet Salad Recipe: Reinventing Perfection


I ate a beet salad at Anepalco's Cafe recently and haven't forgotten that memorable first course. I was inspired by the salty, sweet, and nutty all together on that plate that I wanted to create my own version of this beet salad at home. And I don't even LIKE beets. Or, not until now.
Their version had boiled beets of which I'm not a fan of the texture so my version has raw beets.
Their version had roasted peanuts. Mine has pecans.
Their version had a Mexican Cotija cheese which adds the salty. I chose to use feta.
Both versions have jicama which adds the sweet and crunchy.

Ingredients

1 raw beet peeled and cut in 8 pieces
1/4 jicama peeled and grated
1/8 cup chopped pecans
1/8 cup feta cheese


Arrange on plate with feta first, then the beets and nuts. And finally the jicama. Try to gather a little of either on your fork to get the flavor combinations. You'll change your mind about beets too!

Friday, June 01, 2012

Current Obsession: Dance Auditions of So You Think You Can Dance

I've realized that I frequently become fixated on inspirations. Whether it be a product or idea. I have to find out more, sometimes I have to find that product. This blog post is something I had to find out more about. I'm calling these my Current Obsessions.

I've been a dancer ever since I can remember, so any dance on TV draws my attention. I've been watching the dance auditions on So You Think You Can Dance and my 2 current obsessions are David Matz and Eliana Girard.


David Matz is a genius. His origins in movement are circus and using the Cyr wheel is not considered dancing by the show standards, but his movement is mesmerizing. Using the Cyr wheel to achieve incredible dimensional movement with such skill was just the best thing I've seen. I'm a huge fan!


Eliana Girard a former "pole aerialist" for Cirque du Soleil, who danced with Joffrey Ballet on scholarship and at Alvin Ailey Dance center. She has a strong ballet background and her extensions are beyond belief. She's one of the most impressive dancers I've seen in a long time.

By the way, David Matz is no longer in the competition of SYTYCD, but Eliana Girard is. So look for her to go far.

Monday, May 21, 2012

Repurposed: Console Table - From Southwestern 1980's to Timeless

Our mission is complete. We turned a whitewashed pine, Southwestern style console table into a timeless piece of furniture that's got a walnut finish and has an All-style style. Is that a style?

You may remember my call for help from my readers as to what I should do with this console table. It's a sturdy piece of furniture that I wanted to repurpose rather than get rid of. One of my friends who happens to be an interior designer, came to the rescue with the suggestion on how to achieve the style. And a few of my readers helped me choose the darker finish.

This project took a weekend and a couple of extra days for a second coat of stain and drying time. We started out sanding down the original finish. This took my son and husband and lots of sweat. We probably could have got it done faster if we had a belt sander but it was fun to do this as a family, so I didn't complain.

Then my husband measured out and cut the 5x8 board to fit all four sides of the table as a skirt over the prior design.


He then hammered the skirts directly onto the Southwest design cut outs.
I bet at this point you're wondering at what point did I do anything. Wellllll, I directed up until this point and then I got the task of staining. No heavy lifting for me. Not when I have 2 guys willing and able to help out.


I used Minwax Dark Walnut and did about 2 coats, with drying time in between.

I'm really happy about it. I have another furniture project lined up. This next project will only require staining and a little accessorizing. Stay tuned.

Monday, May 07, 2012

Console Table: Keep It or Ditch It?


Calling all of my design-y type friends and readers. I need your help. I've had this console table that lives behind the couch in the great room for about 20 years. It's pine, natural, and heavy, which I love. But it has got a Southwest style to it, which I can't stand. I've disguised it with table cloths of all types and currently have a table runner and some interesting objects on it so maybe people won't notice. Oh and don't look at the brown thing underneath. That's going as soon as I decide on 2 small stools to go underneath if I keep it. I want to keep it because of the material of it and I believe I can do something to it so it doesn't look Southwest. But what? Or should I just get rid of it and start over? Any ideas?

Monday, April 23, 2012

Neon Painted Vintage Rhinestone Necklace - Tutorial


Statement necklaces are what's in right now. I've seen them all over and want one badly. Color always attracts me. You must know that by now. So I was attracted to the following necklaces like a moth to light. I have dreamed about these very colorful and vibrant neon rhinestone necklaces in the Pure Essentia shop on Etsy. I wish I had $300 to drop for a necklace, but I don't. I searched the internet for tutorials on how to make them. There was this one from A Pair and a Spare that spray paints the whole necklace one color. And there was this one from Ashley Treece, that gave me my jumping off point. First I had to find a vintage rhinestone necklace. I prefer to repurpose something old. A new one would be fine too, but the vintage ones have great shapes to them. Just be careful that if it's a choker, that it's not too small. There's no way to size them larger. I scoured Ebay and found 2 that I purchased and that same day was running errands and found an Estate Sale store by my home. I'm waiting for the Ebay ones to arrive.


And there it was. Not super cheap, but $20 was fine. Be prepared to spend $20-$50 for a necklace. Ok. I had my necklace.

Next was a stop at the drug store to buy brightly colored nail polishes. Look for the $1-$2 bottles. That's all you need.

Make sure the necklace is clean and place it on a piece of white computer paper. Figure out your design with your colors and it's time to begin. The paper allows you to turn your work as you paint. Don't turn the necklace. Leave it in place and just move the paper. Paint each rhinestone carefully but plentifully. You can drop a drop of nail polish onto the stone. It's ok to cover the prongs.


You can always go back and do another coat. Get a toothpick for any miss steps with the nail polish. You can use it to wipe mistakes. Do one color at a time. I started with a yellow on the large teardrop rhinestones and then I figured out my colors from there. You don't need to have them dry between colors, but let it completely dry at the end.


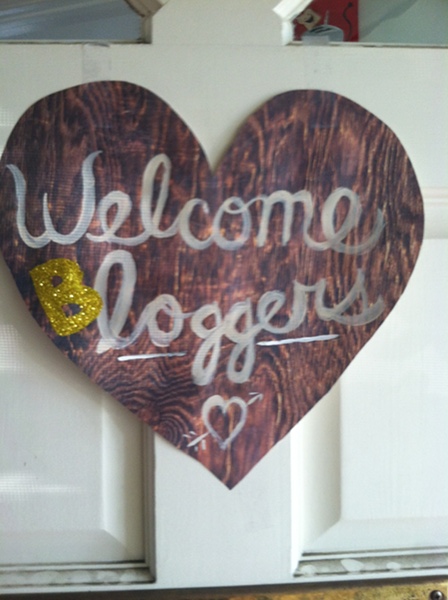
I'd love to have a group get together to do painted necklaces. If people could get their necklaces, and come over, I would supply paint and work surfaces.  Maybe even some food and drinks. Let me know.

Saturday, April 14, 2012

Color Makes Life Brighter

Here's a few photos that I took that are all about the colors. If you're like me, I live for color. Enjoy.